Sunday, August 21, 2011

Dresser before & after


I wanted to redecorate an area of my living room and knew I wanted a dresser-like piece of furniture there. That's was all I knew for sure. So I set out to find a real, solid wood dresser, at - where else? A garage sale.

This is the dresser as I purchased it - for $35 at a garage sale. It's solid wood, it's made extremely well, and it's heavy as hell. It's actually a changing table/baby dresser and wasn't what I was looking for, but since it was the only dresser I saw at over 12 different garage sales, I purchased this one (at the last one I went to) and decided it would do.


I've painted furniture before, but since I actually cared how this one turned out (lol), I decided to follow a tutorial on how to best paint a dresser. The one I found and used, was this one here. I didn't follow her instructions to the letter, but I did do almost all of the steps as she did. I gathered all the products on the supplies list, rolled up my sleeves, said a prayer, and got to work.

This is what the dresser looked like after 3 cans of primer, which I was at least smart enough to do outside. I primed it so I wouldn't have to strip the varnish it, thus speeding the process along at a brisk pace. I thought it would be easy to work with since it was spray, but it was a bit of a pain... let's just say there was a little sanding involved AFTER I primed it.


My intention was to paint the whole thing the light mustard color but while painting, I decided to paint only the front panels and then go back and paint the strip around them - but when I took a step back, I decided I really liked the white trim edge... and went the next day to buy off white paint for them! (the white you see is actually just the primer that hadn't yet been painted)


... and this is the finished product! I *LOVE* how it turned out. I purchased drawer pulls on eBay for $4 each - amber glass pumpkin shaped knows with an aged brass trim on them. Total knock-offs of something fabulous, but they work for me. I finished the whole thing with two coats of a clear coat to protect it. THAT was a pain. But all in all, this turned out to be THE BEST dresser ever, and it has *BOATLOADS* of storage in it. I heart my new piece of furniture. ♥


And the before & after side by side (drumroll please....)


This is the before picture of what one of the walls in my living room looked like, and the after, with my new garage sale love :)


Wednesday, March 2, 2011

Roasted Butternut Squash

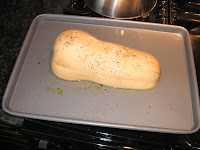
So, you split a butternut in half & scoop out the seeds. Chop 2-4 cloves garlic (depending on your love of garlic & how big the squash is) and place 1/2 in each cavity - secure it in place with a sprig of rosemary. Drizzle oil in each cavity - and rub on flat surface. Generously salt/pepper.


Carefully place each half on cookie sheet, give exterior skin a nice olive oil rubdown - and salt/peppering. Pour about a 1/4 inch of water in the cookie sheet. This will add a bit of steam to the roasting process & keep your squash from drying out. (Can you see the bit of water in this pic?)


Place in 400 degree oven for about an hour. You should check in every now and then to see if you need to add more water. This is the look that you're going for - just roasty enough on the outside, a weensy bit caramelly on the pan and easily pierced by a knife. You'll love how the fragrance that this process creates will fill your kitchen.


Let cool a bit (& remove rosemary sprigs - they are quite pungent & have already added quite a bit of flavor) before scooping out the flesh. If you've properly babysat the water at the bottom of the pan & it hasn't burned too much - pour the caramelly roasting juices in with the scooped out squash-flesh.


Salt - Pepper - Butter to taste. Enjoy!

Monday, February 28, 2011

Yep - trying to win a lens again! lol!

Just so you know, the more you enter, the better your chances of winning - so consider me an entering fool!

You can win a Tamron lens by checking out Clicknmoms here... go ahead and check them out, I love clickinmoms!

Sunday, February 27, 2011

I really, really, really want a new lens

... so I'm posting a link to MCP Actions in hopes I win one.

I have her actions, and they rock. Go check her out. And say a prayer I win a Tamron lens, too :P


Monday, January 17, 2011

I Heart Faces Photo Challenge | Winter Wonderland

The theme this week at iheartfaces is Winter Wonderland. With the weather we've been getting up here in New Jersey, this theme couldn't be more timely! lol! The picture I'm submitting this week is a beauty - it's my oldest daughters first outing into the snow! She was having a great time, thrilled to death to be out and playing in the white stuff, but when it came time to come back in the house... well... you can see her reaction...lol!

Photobucket


Go on over to


to check out more frosty cold pictures!


Monday, January 10, 2011

I Heart Faces - "Smiles"

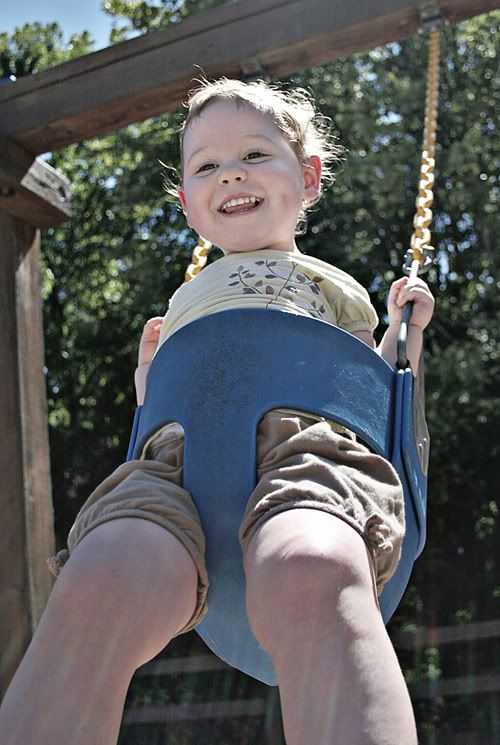
This week in the i heart faces challenge is "Smiles". I must say, I *LOVE* this picture with all my heart. It's just such a perfect shot of my daughter Georgia doing something she loves to do and enjoying it so much. It also doesn't hurt that it shows off her inch-deep dimples :) The smile on her face is just one of pure joy...

Photobucket

To see more gorgeous smiles, go over to


... you'll be glad you did!


Monday, January 3, 2011

iHeartfaces - Best Face Photo of 2010

I've had a ton going on this past year and have been meaning FOR MONTHS to get back to blogging, to photography, to, well, everything I haven't been able to do due to the enormous amount of stuff going on the past few months (or more like the entire year).

I can't even remember where I left off on my blog, but it's possible that I mentioned I was pregnant. Well, I'm not pregnant anymore - and I have another little girl to prove it :) My pregnancy was tumultuous and difficult, and riddled with problems from the start. I ended up being an insulin dependent gestational diabetic who eventually had to go on early disability and be admitted early to the hospital as well. My baby was born a little early and ended up in the NICU for a few days too, which isn't something I wish on my worst enemy.

In the end though (and now 5 months away from having had the c-section), I can now say everything ended extremely well, and this years Christmas card shoot turned out to be awesome, being that I had not one but two beautiful little girls to shoot now - and I also used our Christmas card to announce the addition to the family, which I'd done with my older daughter as well when she was born. So here I will use my "first blog post back to reality" with her announcement picture, which I keep going back to over and over again as my best face shot for 2010. Besides the fact that I brought her into this world with both of us ending up healthy being the best possible outcome I could have ever have hoped for, it's sincerely such a great image - and the post-processing I did actually makes me proud, because when I started out I used to over process everything to death...lol.

Here it is, my best face photo for 2010:

Photobucket

Introducing Charlotte Grace
born at 8:34pm on 7/17/10
8lbs 11oz, 20.5" long
110% kissable


Now go on over to


and check out the rest of the entries!